S13/RPS13 5-Stud Conversion and Brake Upgrade - Fronts
This is by far the greatest performance and safety mod that I've done to my car right next to coilover suspension stuts. I was meaning to write this article up ages ago when I first got the conversion and upgrade done but CBS'd coz there was so much to it. But here we go, finally after coming across a fair deal of confusion online, I think it's about time I shared my experience. I hope that you find this an enlightening and helpful read. I've divided this article up into segments in order to keep each post a manageable size. There were lots of parts involved so I will be posting segments that can come under a different title separately.

Disclaimer:
This article isn't written as a guide or as a set of instructions to show you how to perform a 5-stud conversion or a brake upgrade, whatever you do with this article is done at your own discretion. This article is meant to be used as an informative piece that shows the experiences that I came across while performing a 5-stud conversion and brake upgrade for myself.
Intro:
The reason why I went for a 5 stud conversion was to support a brake upgrade I had in mind, and also to push and develop my ability to perform a significant mechanical task. I had always had a defeated mindset as a youngster when it came to mechanical ability, things started to change when I bought myself a Japanese import. This article was written by me as a technical memoir of the time that I as a 24 year old helpdesk decided to undertake a mechanical task that was beyond my means and ability. A 5-stud conversion, suspension upgrade, brake rebuild, and brake upgrade was carried out by me on my 1994 Nissan 180sx SR20DET with factory ABS. This segment will cover the front wheel 5 stud conversion and brake upgrade. Parts used were:
Front:
Set of front S14/15 hubs, knuckles, baffle plates and lower control arms
Custom machined sleeves to fit s14/15 knuckles to S13/RPS13 struts (14mm OD, 12mm ID)
Set of front R33 GTS-T calipers
Set of front RDA Slotted rotors to suit R33 GTS-T
Set of ADR approved custom made braided brake lines
 |
| From Phillipses blog |

From Phillipses blog

From Phillipses blog
Other:
BM50 – Brake master cylinder from an R32 GTR with factory abs
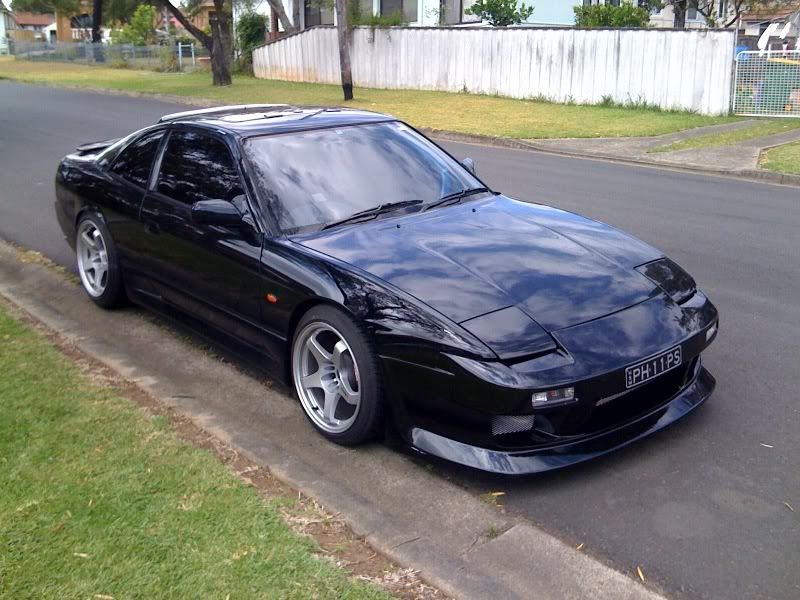
Set of stock S15 rims with brand new Pirelli Pzero Nero's 225/40/16
 |
| From Phillipses blog |
 |
| From Phillipses blog |
Tools:
Full set of screw drivers
Full set of spanners
Full set of flare nut spanners
Full set of 1/4” and 1/2” drive sockets with wrenches and breaker bar
1/2” drive pneumatic rattle gun
Rubber head mallet
Steel hammer
8” 3 claw Gear Puller
2 Car stands
Hydraulic Jack
Couple of bricks or suitable tyre wedge stoppers
It's a good opportunity to upgrade brakes while doing a 5-stud conversion and vice versa. 5-stud conversions require you to remove the brake calipers and brake rotors in the process so the opportunity to change these parts makes itself available. Then there's the matter of having to drill out the 4 stud rotors to 5 stud if choosing to stay with the existing brakes which is illegal. By upgrading brakes, the rotors will also need to be replaced meaning you can find a set of rotors already made suiting the 5 stud configuration. I chose to go for R33 GTS-T front and R32 GTS-T rear brakes with RDA slotted rotors front and rear. These rotors are factory drilled to 5 stud so fit the new setup perfectly. Also remember that upgrading your brakes may create issues with clearance. In cases where rims do not clear brake calipers, spacers may need to be employed temporarily until replacement rims can be sourced.
I performed my conversion and upgrade in my own backyard with little more than hand tools and a rattle gun. I'm not a mechanic, I haven't been playing with cars all my life, I only really became genuinely interested in playing with cars at the age of about 22 when I bought my first car. I must say that though that this conversion and upgrade wasn't easy... I spent a lot of time doing research and there wasn't really a whole lot out there, some of the process was trial and error, and I work full time so was working on the car during nights and some Saturday's. It wasn't an extremely difficult task (it's not rocket science) but it does take a keen spirit, patience, and a fair bit of elbow grease.
5-Stud Conversion-
5 stud conversions have been popular amongst s13 owners to enable fitment of a wider variety of rims. 4 stud rims in good sizes, offsets and design are generally pretty hard to come by, by going 5 stud, you make available to you a much larger range of rims in a wider range of sizes, offsets and design. Whether it be completely for aesthetics, for the purpose of clearing brake calipers after an upgrade, or to modify your vehicle to fit those elusive rims that you've had your eye and heart set on, 5 stud conversions are definitely becoming popular with the 4 stud equipped community. They are famous for Nissan s13's and Honda Civics and Integras. There are quite a few aftermarket options for replacement hubs that will convert 4 studded Silvia's to 5 stud, these require pressing of the aftermarket hub onto the bearing. I chose to go with Stock Nissan parts to ensure quality, reliability and compatability. I've heard mixed reports on aftermarket parts and concluded not to take that path due to safety issues, but also because I found the Nissan OEM parts were locally and readily available. There is a lot of confusion to what will and won't work with 5-stud conversions on S13/RPS13's. There are so many options that are possible, below is a rough guide of what I learned during my research about the most commonly chosen options.
Fronts
S14/S15 hubs pressed into the S13/RPS13 bearings –
 |
| From Phillipses blog |
Requires to have your old 4 stud hubs pressed out, and new hubs pressed in. Will retain ABS if the car is currently equipped with ABS. Nowadays you won't find too many hubs selling detached from the bearing. No change to track, toe, castor or camber. Stock uprights and control arms are retained. This method will require you to use a rattle gun to unbolt the hub from the upright (It's darn impossible to remove the bolts other wise) and take the hub/bearing assembly shop to be pressed out and have the 5 stud hub pressed in. I'm a little biased towards OEM parts as you can trust them to last the distance.
Aftermarket 5-stud hubs pressed into the S13/RPS13 bearings –
 |
| From Phillipses blog |
Works much like pressing Nissan OEM 5 stud hubs into your existing bearings, just make sure that the hubs will fit the bearings as I've heard of a case where someone had to get different bearings made to fit the hubs into the uprights which is not cheap. The manufacturing quality and standard of the hub also varies as is the installation process (some hubs kits come with detached screw threads that require loctite), make sure you do your homework if choosing this path. This is a common and popular approach to 5-stud conversions, and there are many examples of high quality installs using aftermarket hubs. Must check to whether or not ABS is retained in ABS equipped cars. This method will also not make any changes to track, toe, castor or camber.
S14/15 OEM hubs and bearings assembly (generally comes attached to uprights with LCA's) –
|
| From Phillipses blog |
From what I've found, the most common of all, and the path that I chose. OEM products mean you know that they work as they are used on production cars, I bought my hubs already bolted into the s14/15 upright assembly complete with LCA's, rotors and calipers. All I had to do was bolt the assembly into my rails and struts with the help of some custom sleeves. The custom sleeves are required to attach the uprights to the stut mounting holes. Reason being, S14/15 upright mounting holes have a 14mm diameter, whereas S13/RPS13 strut mounting holes are 12mm in Diameter, these sleeves ensure that there is no free play in the uprights once mounted onto the strut. Note that using S14/15 uprights and LCA's although convenient will increase your track by a total of 10mm over both front wheels, which will mean some horrible toe out after install. This means that you will need a major wheel alignment immediately after the install and your car will handle differently afterwards (less understeer). Some people may find this undesirable. In the case of having S14/15 uprights without LCA's, you can opt to have new ball joins (R33 GTS-T ball joins to be exact) pressed into your existing LCA's to fit the S14/15 LCA's as they are a different size. I've heard from a few knowledged people and a performance shop employee that this method can come across some reliability issues, and it is best to stick with the S14/15 LCA's despite the slight increase in track.
Brake Upgrade-
The brake upgrade is also a very popular modification performed on S13/RPS13 Silvia's. The stock brakes on an SR20DET S13/RPS13 are pretty crap to say the least. They are a single pot setup both for both front and rear calipers. The rear calipers have combined hydraulic and cable utility so that the caliper actions to both foot pedal and handbrake lever. It is common for people to upgrade the front calipers of an S13/RPS13 yet leave the stock rear caliper. This is partly due to the fact that upgrading the rear calipers requires extensive work in implementing a drum handbrake assembly. I chose again to go with Nissan OEM parts as they are cheap, readily available, work remarkably well, are easily rebuildable and are a direct bolt on. I upgraded both front and rear calipers including implementing the drum handbrake assembly. This allows maintaining the balance of brake bias between the front and rear calipers for a more controlled and predictable braking behaviour. There are heaps of options on what is available to s13's as brake upgrades, some of these bolt on, some of these don't. Remember that when calipers are upgraded, rotors must also be upgraded accordingly as well as the Brake Master Cylinder to maintain brake pedal firmness and effectiveness. Below is a list of viable options throughout the Nissan OEM range and the impressions I made of them when I was doing my research.
Fronts
S14/15 –
 |
| From Phillipses blog |
One of the most popular choices if not the most popular choice of upgrade for S13/RPS13. These are 4 pot callipers and are made of Iron. They are very similar to the front calipers found on R32 GTS-T and 300ZX only they are heavier being cast of iron and not alloy. Rotor size is 280mm diameter x 30mm ventilated thickness. Popular because they are relatively inexpensive, quite common and have great stopping power. They are quite simple to rebuild and look great.
R32 GTS-T –
 |
| From Phillipses blog |
Another very popular choice of upgrade for S13/RPS13. Similar to the S14/15 calipers, they too are 4 pot only they are made from alloy which make them significantly lighter which reduces unsprung weight. Rotor sizes are the same as S15 at 280mm diameter X 30mm ventilated thickness. I found that R32 GTS-T are still quite commonly available, and are great value. Again simple to rebuild.
300ZX Z32 –
 |
| From Phillipses blog |
Built pretty much identical to the R32 GTS-T calipers, the Z32 calipers can be identified by their heat sink cooling fins. Again made from alloy and sharing the same rotor sizes as the S14/15 and R32 GTS-T measuring in at 280mm diameter x 30mm ventilated thickness. Simple to rebuild.
R33 GTS-T –
 |
| From Phillipses blog |
Moving up in size from the S14/15, R32 GTS-T and Z32 stands the R33 GTS-T calipers. Made from alloy, but sporting larger pistons means more even stopping surface pressure, which means greater stopping force can be applied before locking up. These are the calipers I installed in my 180sx. Slightly more expensive than the calipers above and physically larger, the stopping force on these guys are immense. I rebuilt mine by myself and had them powdercoated, the whole process was relatively simple. The rotor sizes of increase slightly over the previous mentioned, being 296mm diameter x 30mm ventilated thickness.
R32 GTR –
 |
| From Phillipses blog |
Having slightly thicker cross drilled rotors and again larger and deeper pistons over the previous mentioned brakes, the R32 GTR front brakes are very highly rated and have amazing stopping power. The cross drilled rotors eliminate excess weight and prevent brake pads from glazing. Some people claim that cross drilled rotors improve ventilations or cooling, I was always under the assumption that the more surface are there was to cool, the higher the rate of cooling. These rotors measure in at 296mm diameter x 32mm ventilated thickness. The caliper is made of alloy and is slightly larger than the R33 GTS-T caliper due to the larger, and deeper pistons.
R32 GTR VspecII/R33 GTR Brembo –
 |
| From Phillipses blog |
The highest performing bolt on Nissan OEM replacement one can hope for. These calipers are 4 piston black ceramic coated with gold print. The rotors measure in at a whopping 324mm diameter x 30mm ventilated thickness. Significantly more expensive then the Sumitomo produced calipers (the non-brembo Silvia, Skyline and Z calipers), and much less commonly found for sale, these are reserved for those running big numbers requiring the monstrous stopping power that these brakes offer. The rotors vary from slotted and cross-drilled all finished with anodised alloy hats.
R34GTR/Z33 (350Z) –
 |
| From Phillipses blog |
Same specs as the R32 GTTR VspecII and R33 GTR Brembo's, only these are gold ceramic coated with red print, and the mounting holes are slightly different meaning that adaptor plates will need to be made up in order to retrofit these to Silvia's, pre R34 Skyline's, and pre Z33's.
Installation Process:
Fronts
Upgrading seems simple now that I look at it in hindsight, but it was almost torturous while I was there. I made sure to take my time and not put myself in a place where I could risk getting badly hurt or damaging my car, parts or tools.


Begin first by chocking the rear wheels with bricks and jacking the front end up with a good jack underneath the crossmember, using car stands, settle the front end onto the stands making contact with the rails and proceed on to remove both wheels. Then continue by removing the old caliper off the upright by unbolting it from behind. There's two bolts holding it very firmly in place. WD40 or similar penetrating solvent works wonders.

Using a flare nut spanner, disconnect the brake hose at where it meets the solid brake line at the chassis point indicated above in yellow. Remove the brake hose clip indicated in pink by pulling the clip away from the strut using a pair of pliers. After the clip comes off the caliper should be free, take caliper and place it aside. The rotor can then be removed from the hub by tapping the hat of the rotor with a steel hammer to break the bind of the rust and grit caught between the rotor and hub. If the rotor seems really stuck, you can screw an appropriate sized bolt into the screw holes found on the hat of the rotor, this will pry the rotor off the hub, be sure to use the correct size screw, you don't want the screw threading, becoming stuck or snapping while doing this.


If your car is equipped with ABS like mine, you will be required to disconnect the ABS sensor, this is identified by the thick insulating wire that leads from the chassis much like the brake line and joins the sensor into the upright and is screwed into place by a 10mm hex screw. This may take a bit of fidgeting as the sensor is pressed in tight, be patient and keep working at it, it'll come out. I worked the sensor out just enough to wedfge a flathead screwdriver in between the sensor and upright and gently but firmly pried the unit out that way.

After the ABS sensor has come out, proceed to unbolt the control arms from the assembly marked above in yellow. The steering rack balljoint is held in by a cotter pin so make sure to undo that before undoing the nut. Even after the nut is undone, the balljoint might not fall out freely so you may need to tap the end of the ball joint with a hammer, remember to place a nut over the first few threads so you'll be hammering tht nut, not the balljoint to avoid damaging the thread. The castor rods and sway bars undo quite simply from nuts tightened to the bottom side. After the control arms are free, free upright from the strut by undoing the two bolts highlighted in pink, using an the rattle gun. Make sure you have a crate or some kind of support under the assembly to support it after it is unbolted as it's quite heavy. Next unbolt the lower control arm from the chassis highlighted in green, I couldn't get the rattle gun in there so I used a breaker bar instead. Once the lower control arm is free, remove the assembly and put it aside.

At this point insert the custom made sleeves into the S14/15 bolt holes. The reason for these is to close in the 14mm holes to 12mm as S13's use a 12mm diameter bolt whereas S14/15's use a 14mm diameter bolt to secure the uprights to the strut, alternatively, you can drill out the 12mm holes in your struts to 14mm. Having done this, use the reverse of the previous steps, reassemble the S14/15 upright assembly to the chassis, strut and control arms, also remembering to reconnect the ABS sensor. In my case I didn't connect the shown caliper as I had a set of R33 calipers planned for install.

For those who are planning to go any R33 GTS-T caliper or larger, you will need to cut a set of grooves into the dish of the bash plate and bend the dish out to make a flat pan as shown above. This is so that the rotors can fit without fouling on the bash plate. Use a hacksaw or suitable cutting tool to cut into the wall of the plate to at least the depth of the pan, from there, use pliers to bend the plate out. Fit the larger rotor and ensure that there is enough room to avoid fouling.

At this point, install your new rotor onto the hub, fit the caliper over the rotor and bolt it securely into the upright. Remember to use the right caliper, LHS for passenger side and RHS for drivers side. The nipple must always face the top. Connect the brake hose mid section to the strut using the brake hose clips, and connect the ends of the hose to the caliper and chassis hardline.

Next, line up your 5 stud rims and tighten them up... Repeat the process for the other side... Lower the car and voila! Time to move onto the rears. Do NOT drive the car as there is now air in the brake lines and the car will not be able to brake effectively.
Brake Master Cylinder (BMC)
The purpose of upgrading the BMC is to increase the pedal firmness under braking after a brake upgrade. Without upgrading the BMC after a significant brake upgrade, it is possible for the brake pedal to to hit the floor before 100% braking efficiency is acheived. ABS model BMC's must be used with ABS equipped vehicles likewise non ABS model BMC's must be used with car's not equipped with ABS. Note that my car had come equipped with a BM50 which is the same model as the R32GTR ABS model, meaning I didn't need to upgrade. If this is your case, then you also can retain your BMC.

Start by opening your bonnet, the BMC is located on the firewall where the steering wheel is located.

Unclip the power cable highlighted in green, and using a flare nut spanner, unscrew the flare nuts from the threads marked in yellow. Be careful as flare nuts are very easy to round off. Unbolt the BMC from the firewall via the bolts that yu will find where the blue markers are. Reverse the process to install the new BMC.
Flush/Bleed Your Brakes
This is a very important step. Modifying your brake system has caused air to become trapped in the lines. Unlike brake fluid, air is highly compressible so drastically hinders your braking performance. Bleeding will cause all the air to exit a brake system, whereas a flush completely replaces the fluid in a system with new fluid. Flushing/Bleeding your brakes works best with 3 people. One to compress, and one to bleed, one to keep the BMC filled. Purchase the correct brake fluid, I purchased DOT4 and used 2 standard service sized bottles for a full flush and it was JUST enough. Do not use the wrong brake fluid as it may cause damage to your brake system which can lead to failure. Start from the caliper furthest from the BMC and work your way to the closest one. So for Silvia's and Skylines from Japan and Australia
(ie right hand drive), that would be rear passenger first, rear driver second, front passenger third, front driver fourth. Place a brick or similar spacer behind the brake pedal so it doesn't bottom out, brakes bottoming out is a big no-no as it destroys BMC's. Do not ever let the BMC run dry as this will suck air into the brake system defeating the purpose of flushing/bleeding the brakes. This takes a bit of team work and coordination as one person will call as he compresses the brake, and the second person will have to open the nipple during compression, but close it when the pedal is released. The third person must always make sure that the BMC is at full. This should continue until there are no bubbles in the fluid and when the new fluid starts to bleed. You can usually tell by the colour change.
Before you go out to test the new brakes
The wheel alignment is going to be crazily out due to all the major surgery, so see a wheel specialist right away and get a full wheel alignment.
The difference it makes
As I mentioned at the beginning of the article, the brake upgroad is by far the greatest performance and safety mod that I've done to my car right next to coilover suspension struts... After the wheel alignment, I noticed the difference right away... ABS works as normal but braking effectiveness has increased dramatically... Slamming on the window now propels me out of my seat like crazy. I've also got some fat wheels since starting this article taking advantage of the 5 stud conversion